Laptop Configuration for ACDelco TLC
This is how I got v1.24.0 of ACDelco Techline Connect working on a Windows 11 laptop. Techline Connect is the application used to program modules on newer GM vehicles. It’s part of the ACDelco Technical Delivery System (TDS). As of this writing the website URL is https://www.acdelcotds.com/. It was a frustrating process for me and I’m a technology veteran of 25 years so I can only imagine the mechanics in the world who aren’t good with computers swearing at their laptops. It makes it even more challenging for us independent guys who are not GM employees. It makes launching and logging in not intuitive.
This is what the page looks like.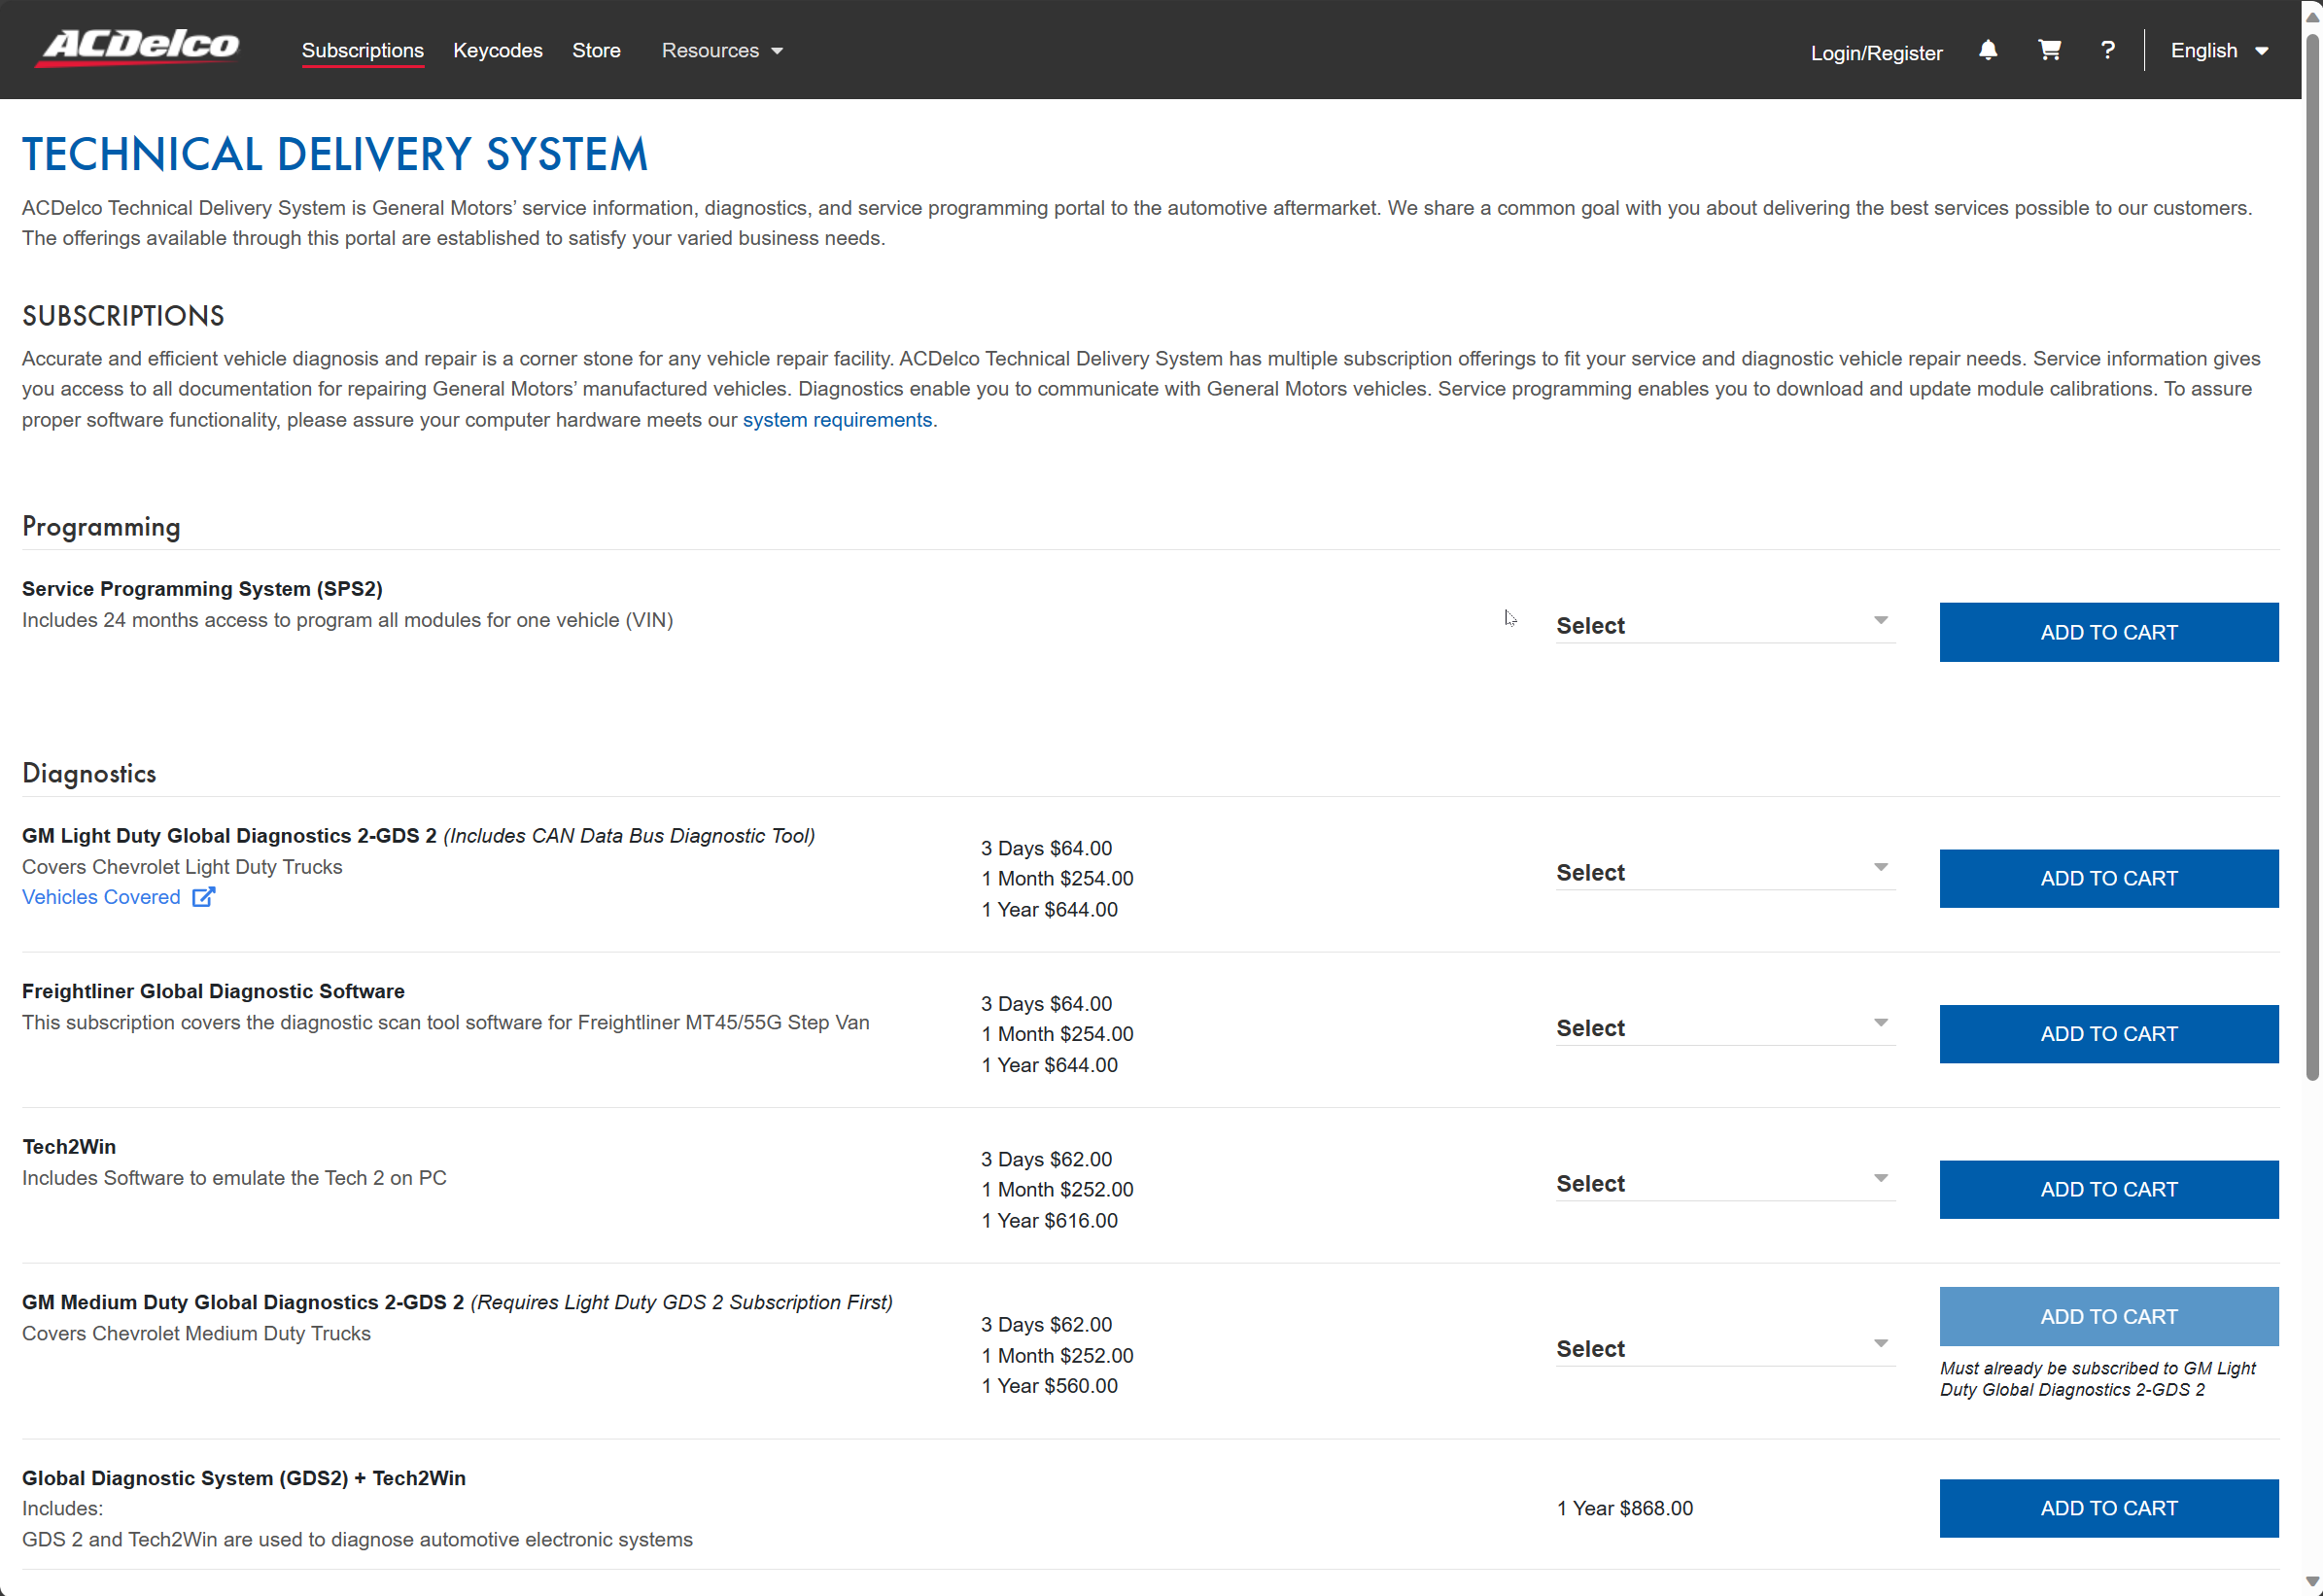
In the upper right, you’ll see a “Login/Register” button. Click on that and login if you already have an account, if you don’t click the “Sign up” button.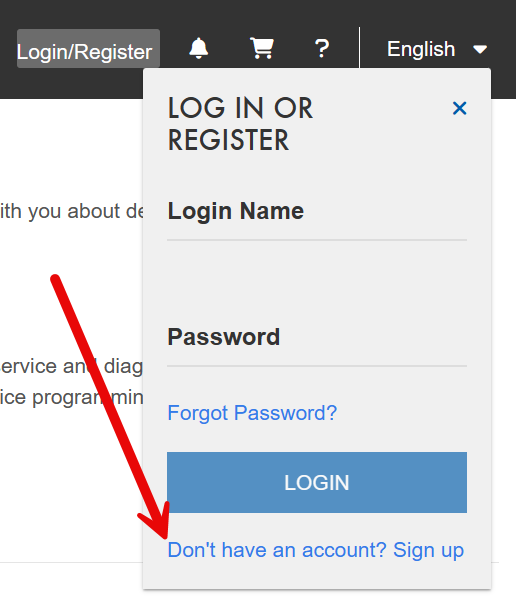
Now that you have an account, close Edge and from here on out you will want to launch Edge as administrator. For now I’ll just show the right click menu I used, I’m going to create a shortcut that auto launches as administrator, but my first attempts failed. What you are seeing here are two opposing forces. Microsoft wanting to make the computer default secure and ACDelco not knowing how to write a program that doesn’t constantly need administrator rights.
Right click on the desktop icon for Edge, then click the “Run as adminstrator”. 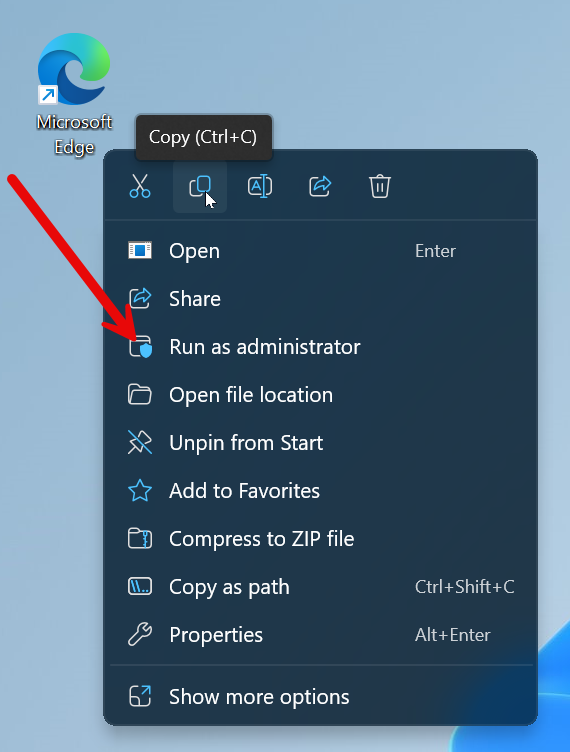
After you launch it as administrator, navigate back to https://www.acdelcotds.com and login. Once you are logged in, click the “View” icon in the “My Subscriptions” section. This will pop up a window with your active VIN’s or it’ll be empty if this is your first vehicle. 
From the pop up, if you already have a VIN in, click on that VIN. If you don’t have a VIN, click “Add VIN”. This is where we will get the software to install. The process of adding a VIN is easiest later in the process after the MDI2 is connected to the vehicle. 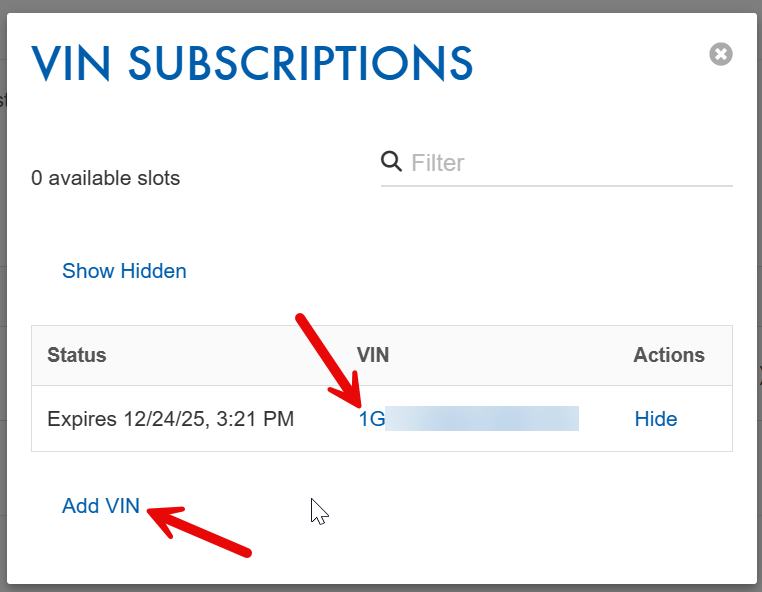
This will open a new tab in the same browser. This is where you can download the initial software or launch the currently installed version. I called it the initial software because it’s like a pilot light running on your computer. When you launch it, it needs to install specific software like MDI1, MDI2, Tech2, and J-box drivers. This is why it’s easier to launch the browser as administrator then check the box for “Launch Techline Connect as admin”. What I think they were trying to do was allow the basic page to launch as a regular user then launch the application as administrator. In my experience this was where it all falls apart and is frustrating. It just doesn’t seem to work right when I took this process. Only launching the browser as administrator worked for me.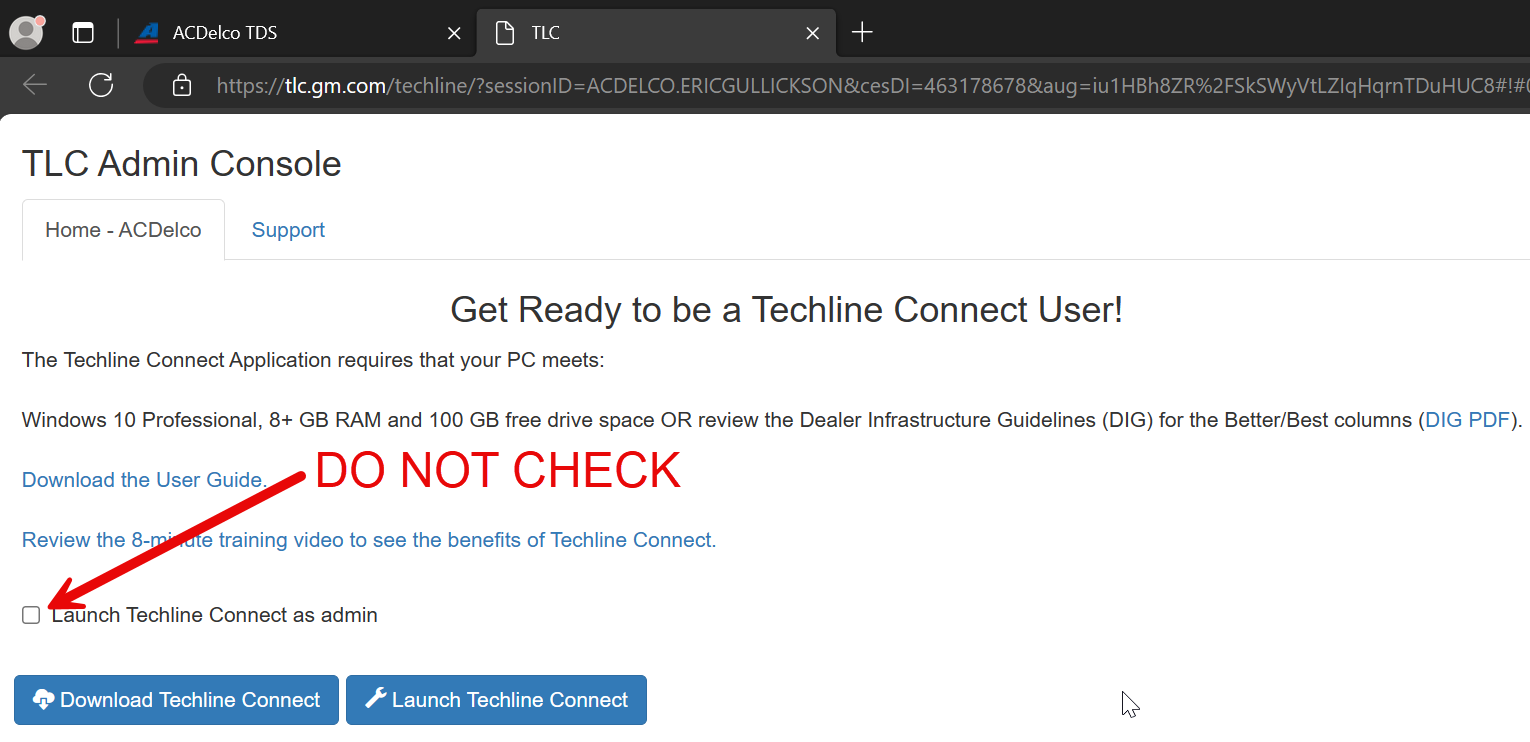
I didn’t get any screenshots of the pilot light application install. That’s a basic next, next, finish installation. After you have the pilot light application installed, then when you click “Launch Techline Connect” it will check your account and install the additional applications. This is the screen I got. 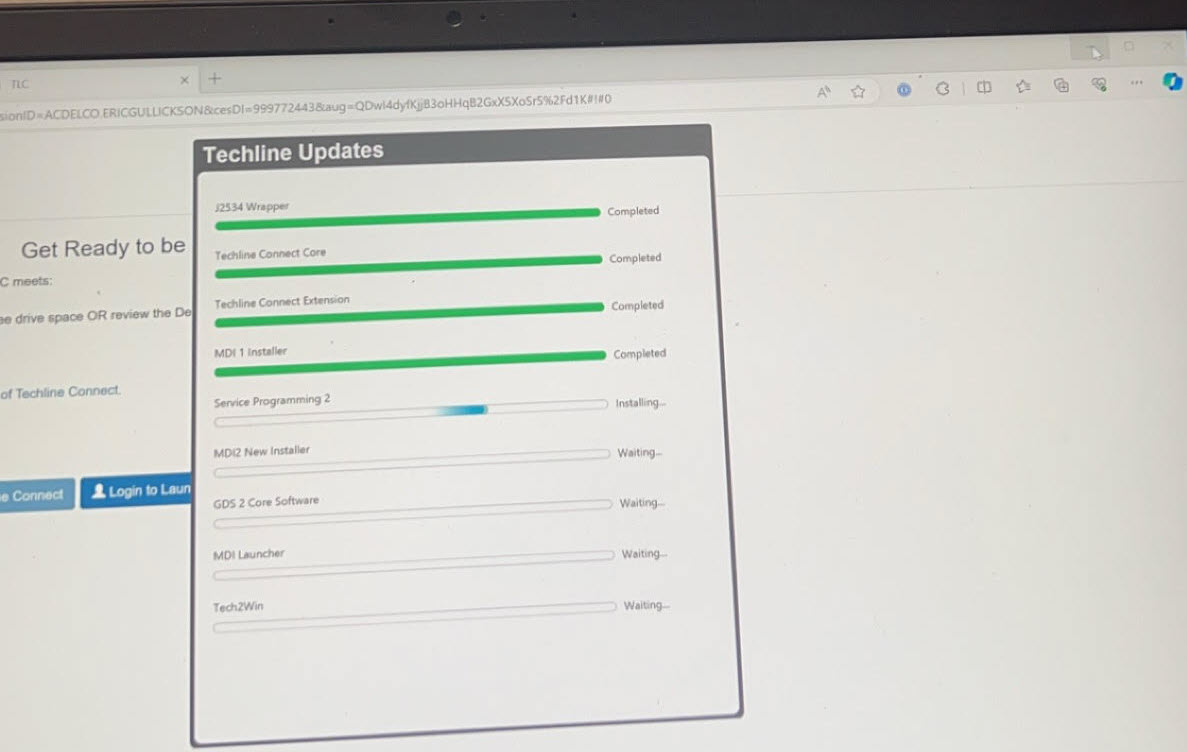
Mine failed after installing the MDI2 New Installer. That was because a driver installed and the system needed to be rebooted to recognize it. You’ll want to reboot your laptop at this point. After the system reboots, you’ll want to launch Techline Connect as administrator from the desktop. This will finish the installation that was previously started.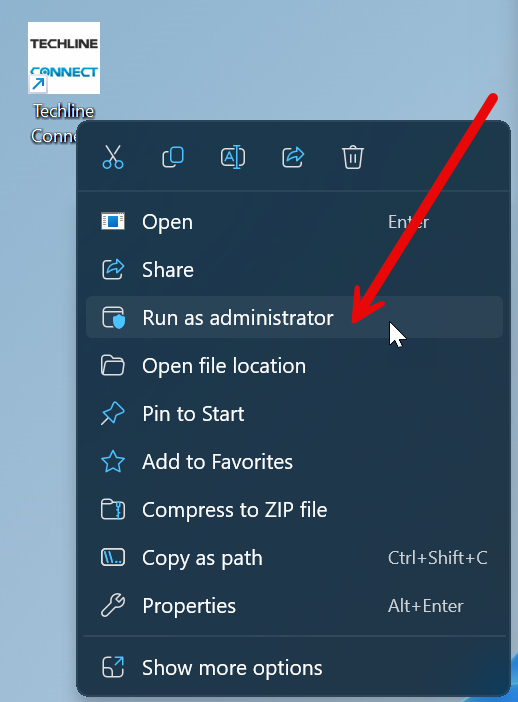
This screen will pop up and if you did it right, you’ll have green check marks. 
After everything has been updated you’ll be prompted with this screen. At this point, close the application and go back to the web page. You’ll see they are even moving the GM employee logins back to the web page so everyone will soon have to go through this process. 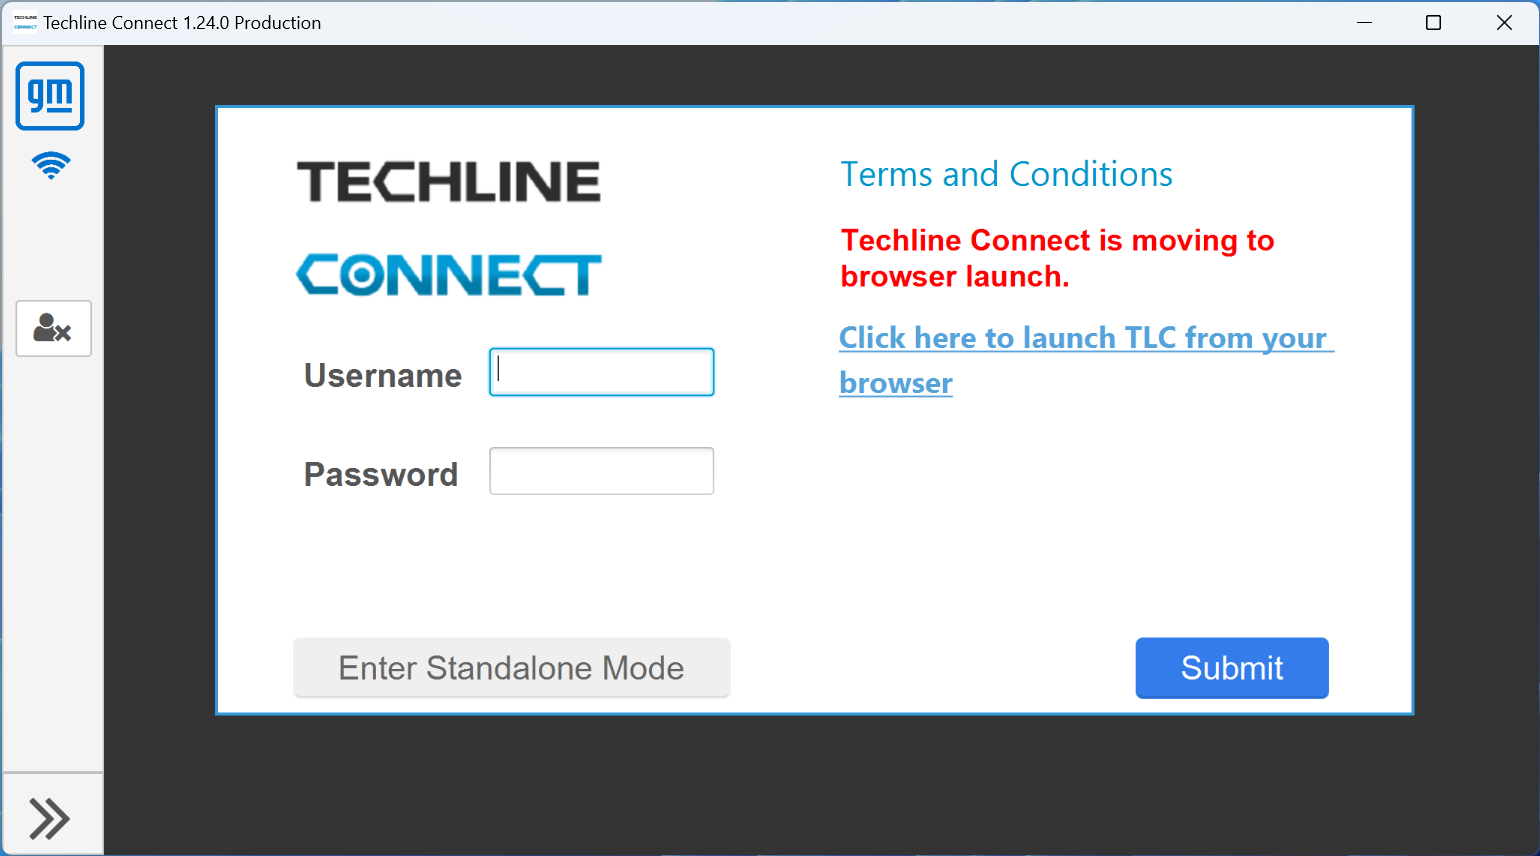
After going back and launching the Techline Connect application from the web page, the same checking lease screen will show up. But this time instead of being prompted to login, you should be prompted to connect to a vehicle with a screen like this. This is where you can connect to a vehicle and use an available VIN slot. 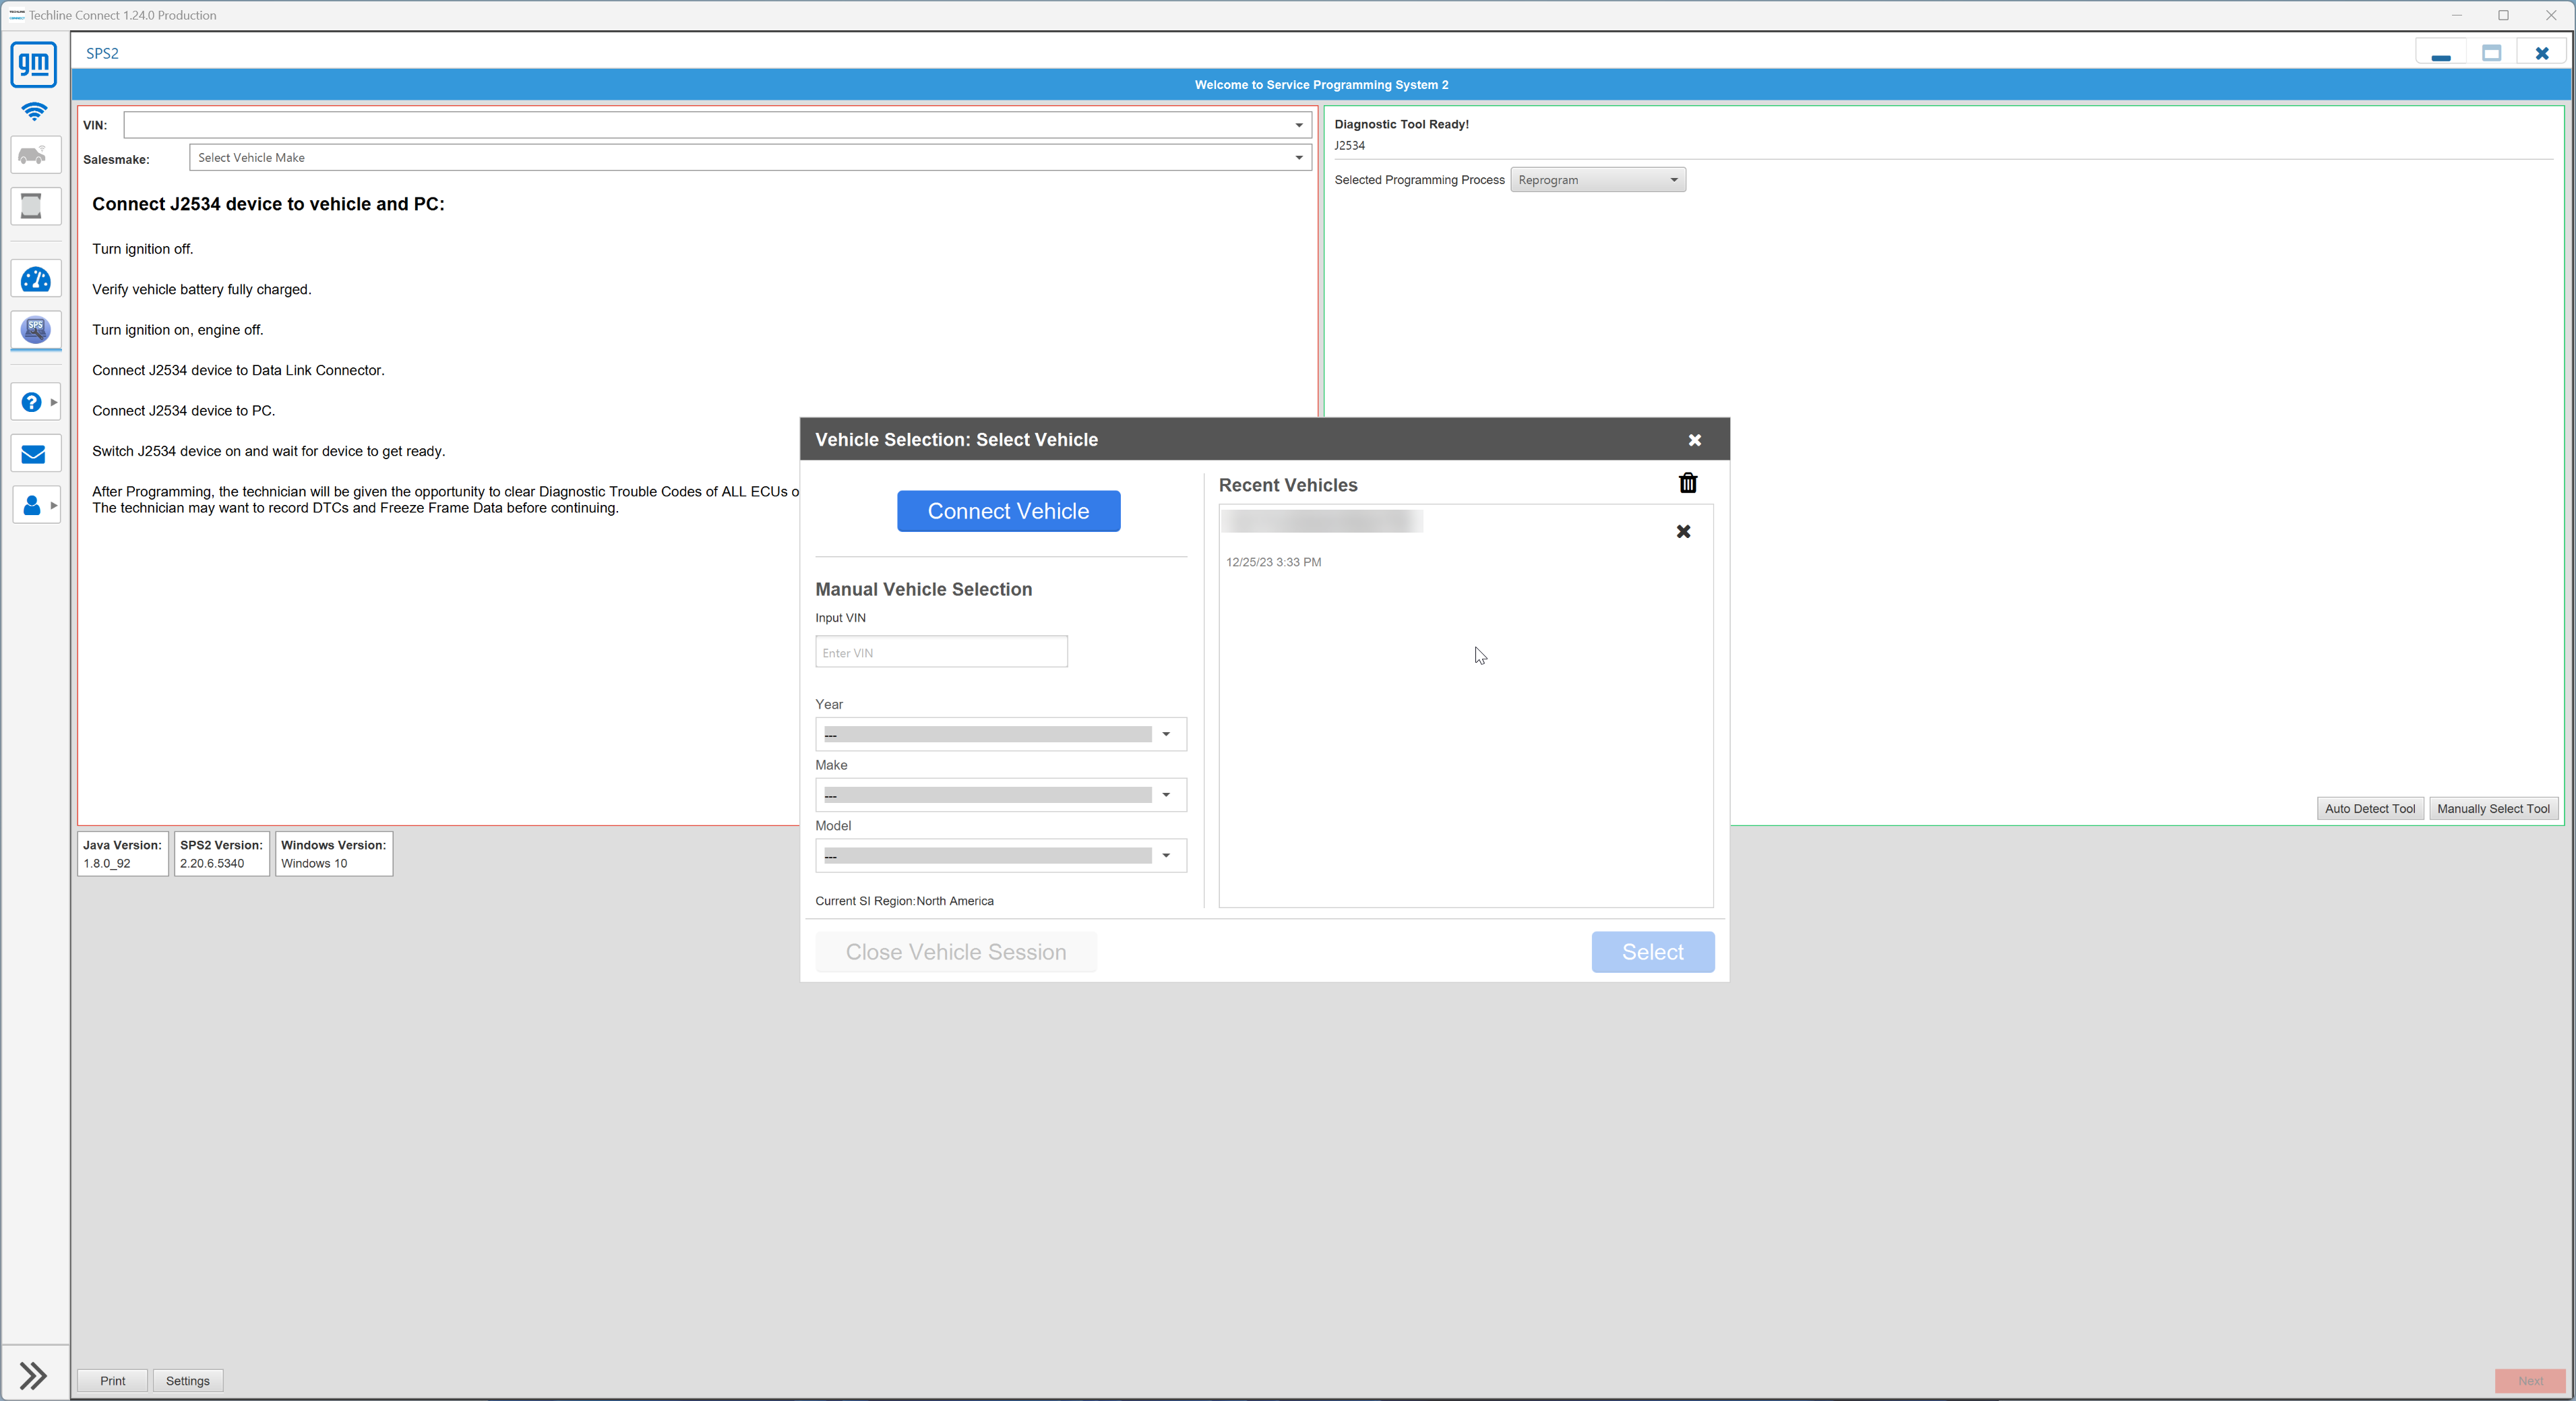
Leave a Reply